If the old site has one or more images they must first be copied to the Media Library. The procedure for doing that is described on the Copy image page.
To insert an image on the new site follow these steps:
In the text location where the image is to be located press enter to make a new line. It will look like this:

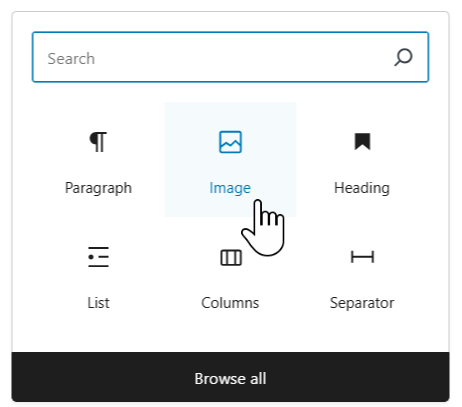
Click the dark square with the plus-sign. In the small window click the Image icon. If you do not see the Image icon there, click Browse all.
You can also click the blue square with a plus-sign near the upper left corner.
Note: If there is no black square with a plus-sign, click the blue square with a plus-sign in the upper left.
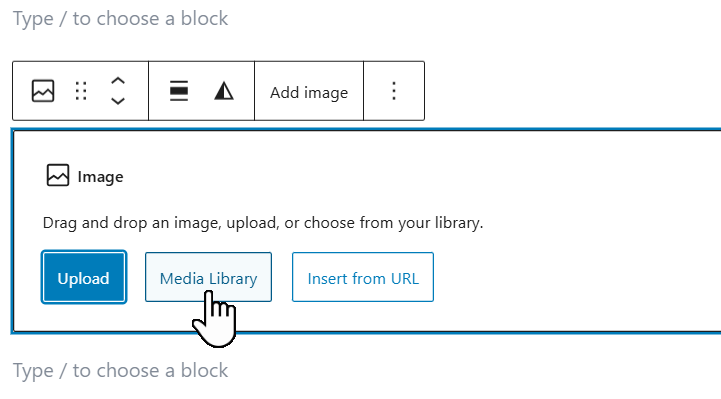
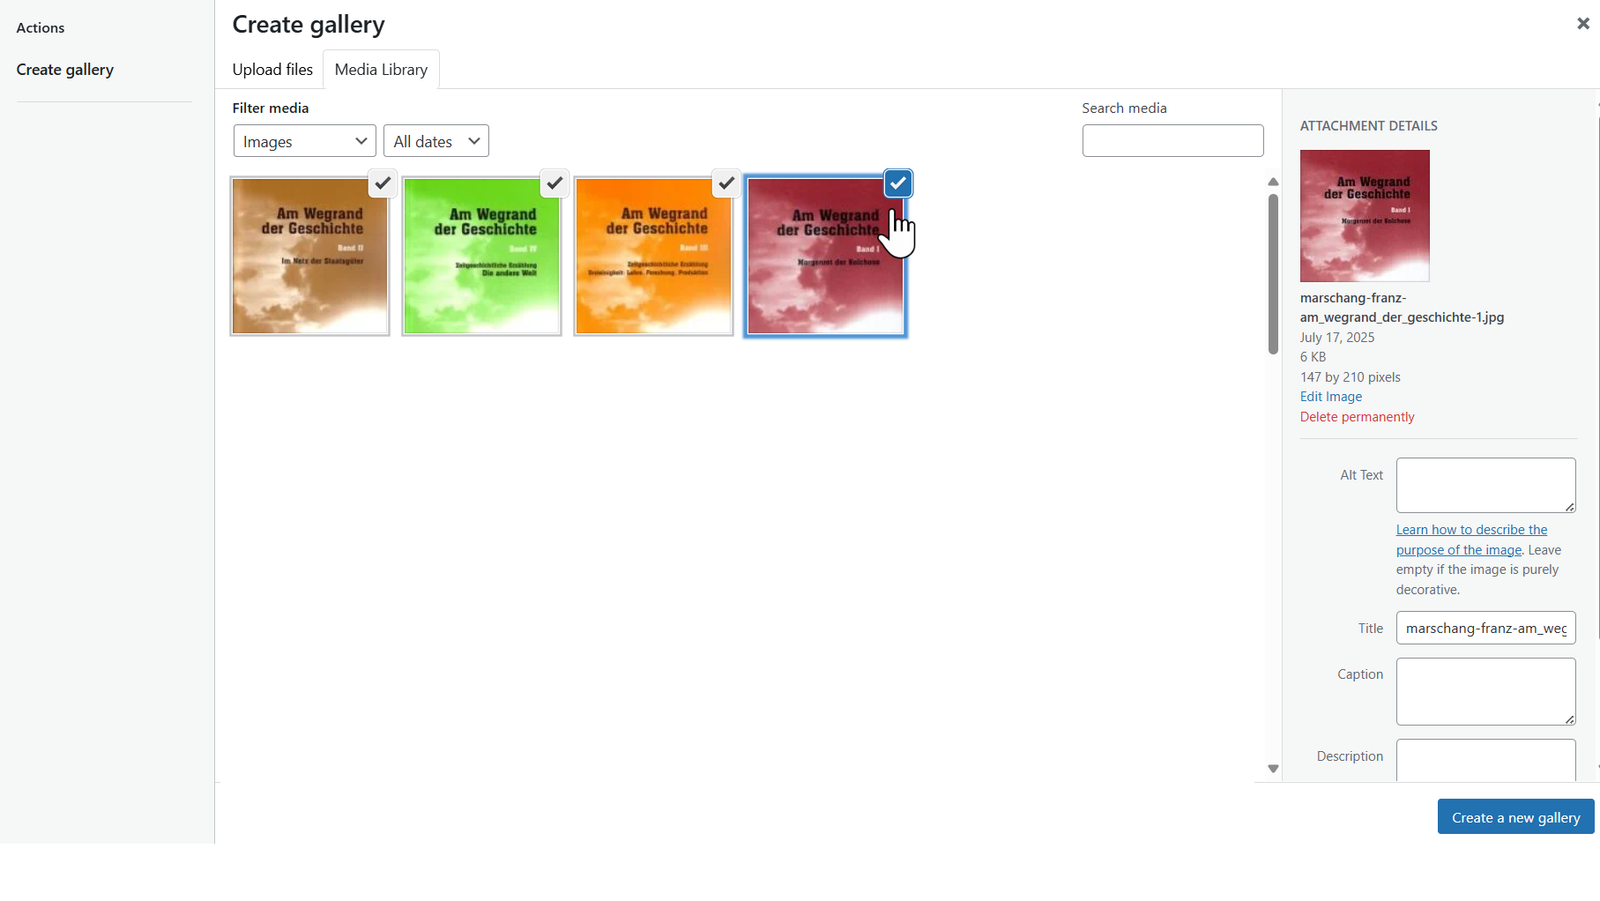
In the pop-up window click Media Library.
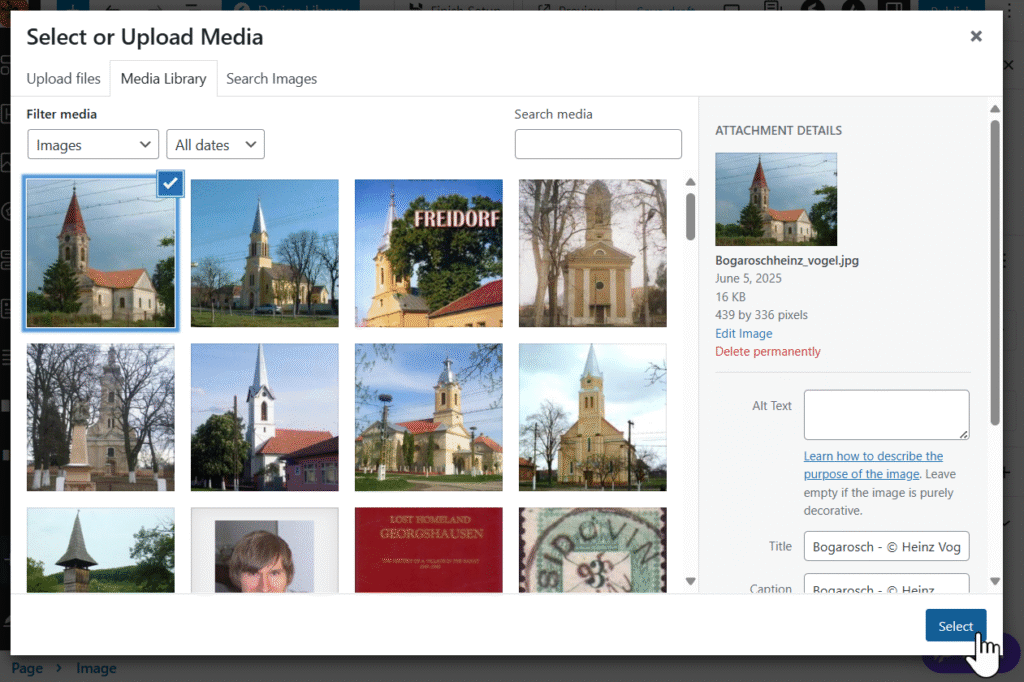
In Media Library you will see the images that you uploaded at the top left. Be careful, another volunteer working on the site might have just uploaded images and they show up there. Be sure to find the correct image.
Click the image. See the checkmark in the upper right comer of the image.
Then in the lower right click Select.
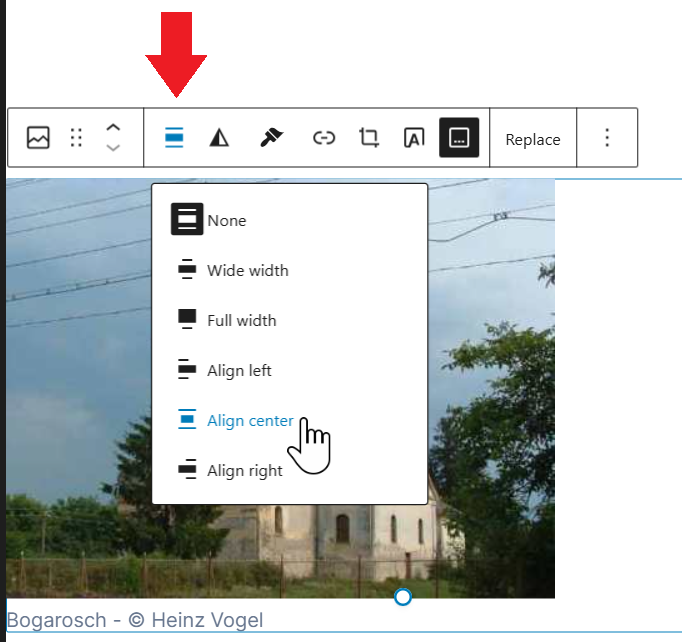
The image will show up on your page aligned to the left.
In the little menu bar above the image click the Align icon (below the red arrow in the illustration) and click Align center.
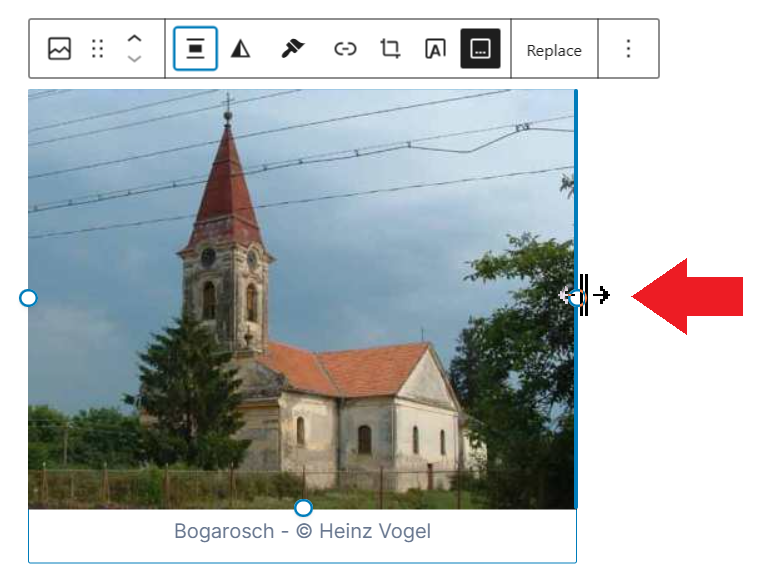
Note the small blue circles on one or more of the edges of the image. Those are resizing handles. When you move the cursor to one of them the cursor changes to show its function. To make an image smaller click and hold on any of those circles. You can resize the image by dragging any one of those handles. The image will not be stretched, it will resize in its correct aspect ratio.
Please do not make images larger. Most of the images on the old DVHH site are quite small. Making them larger just makes them blurrier. Some images be larger than you want and resizing down is appropriate.
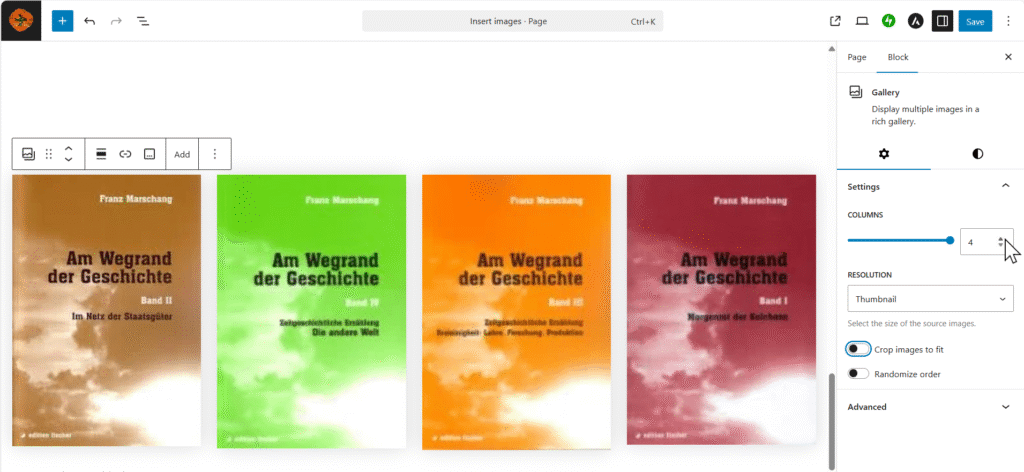
Inserting several images side-by-side
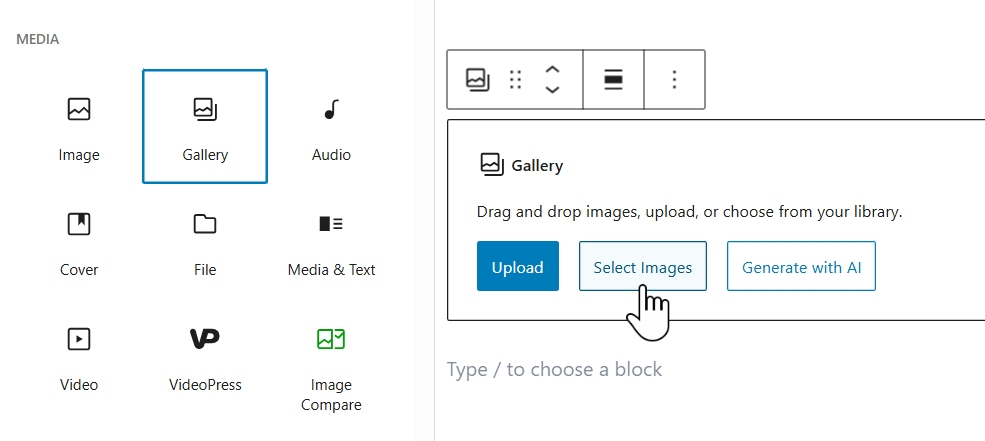
To show images side by side use the Gallery bock.
Click Add block ![]() — then select Browse all – in sidebar scroll down to Media and select the Gallery icon.
— then select Browse all – in sidebar scroll down to Media and select the Gallery icon. ![]()
Follow the instructions.
- Click Select images
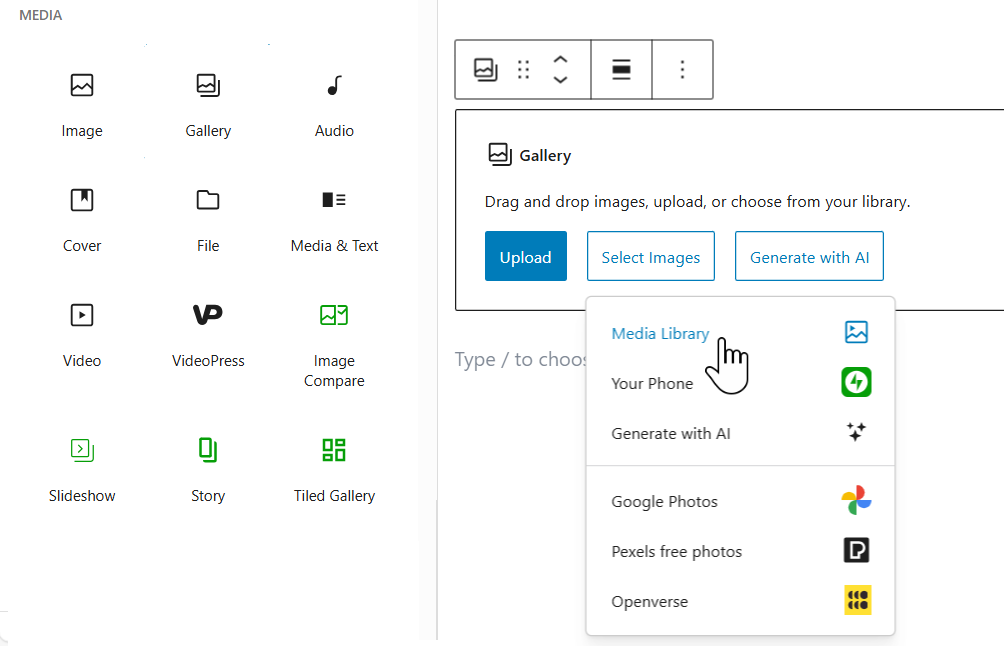
- Click Media Library
- Click the images to insert then click Create a new gallery (lower right)
- Click Insert gallery
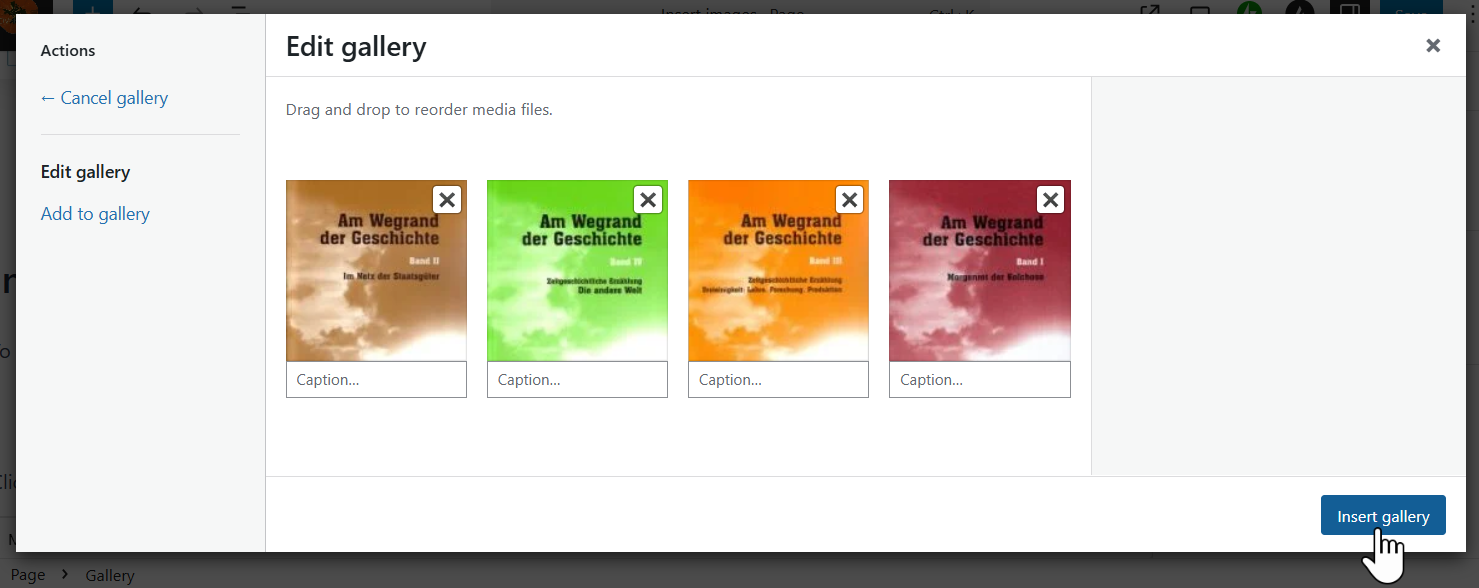
When the gallery is selected the number of images per line can be selected in the right Settings column. It is usually best to set Crop images to fit to off.